
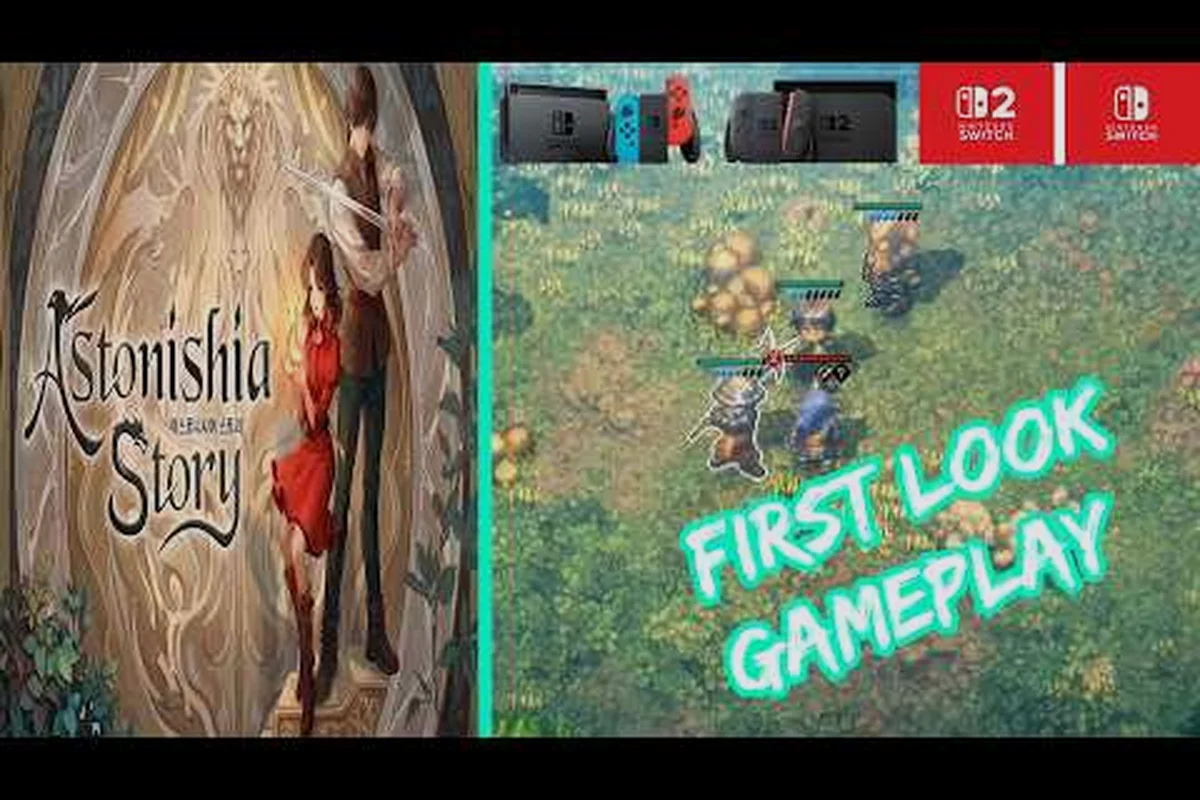
The Astonishia Story Battle System at a Glance
Astonishia Story is a tactical RPG where every fight plays out on a visible grid, and every action — movement, attack, or ability — costs part of your turn. The combat system in this remake combines classic 1990s positioning rules with modern quality-of-life, and learning it early is the single biggest factor in surviving the road from the tutorial dungeon to the late-game mercenary hunts.
The 2027 remake, published by NIS America and developed by DAEWON MEDIA and WAYCODER, is described on the Astonishia Story Steam store page as a "Grid-Based Gambits" system: each character occupies a tile, abilities fire across the grid, and positioning directly controls whether your attacks land or your party gets wiped. Because turn order is fixed and visible, combat rewards planning over reflexes, and that planning is what this combat guide is built around.
If you have never played the original 1994 Korean release by Sonnori, you will find the rules below familiar if you have ever touched a Fire Emblem, Final Fantasy Tactics, or Tactics Ogre game. If those names mean nothing to you, the grid and turn order may feel slower than a standard JRPG at first. Once the system clicks, however, every encounter becomes a small puzzle you can solve before pressing a single button.
Before diving into the deep mechanics, the short version of everything this combat guide covers is this: every fight in Astonishia Story resolves on the same fixed isometric grid, and the player who plans two turns ahead will almost always beat the player who only reacts to the current one. The sections that follow break that single idea into its six load-bearing parts — grid layout, movement points, turn order, action economy, ability ranges, and positioning — and each one is written so you can read it standalone or jump back to it from a specific encounter you are stuck on, from the opening encounter with the bandits on the Mill Road to the late-game mercenary hunts where every tile of elevation decides whether a boss fight ends in a wipe or a clean victory.
-
Grid layout — every fight uses an isometric tile board where each character takes one square
-
Movement points (MP) — every unit has a pool of tiles it can cross per turn, defined by class
-
Turn order — the order in which units act is shown in a side panel and resets at the start of every round
-
Action economy — moving and attacking are separate actions, so chaining both costs MP plus your attack
-
Ability ranges — melee, ranged, and magic abilities all have minimum and maximum tile reach
-
Positioning — flanking, elevation, and line of sight all change hit chance and damage
That is the framework. The rest of this article breaks each of those six pieces — grid layout, movement points, turn order, action economy, ability ranges, and positioning — into the exact numbers, edge-case rules, and small in-fight habits that turn a confused first playthrough into a confident Astonishia Story run, from the opening bandit encounter on the Mill Road all the way through the late-game mercenary hunts where elevation, flanking, and line-of-sight tiles decide whether a boss fight ends in a clean victory or a full party wipe.
How the Astonishia Story Grid Battles Work
The grid is the heart of the Astonishia Story battle system, and every other rule sits on top of it. Unlike menu-driven RPGs where you pick "Fight" and the game decides whether you hit, here you choose a square, you choose a target, and the geometry of the board decides whether the move is even legal.
Tile Types and Board Shape
Most encounters take place on a square or rectangular grid ranging from 6x6 to 10x10 tiles, where the board size directly reflects encounter stakes — wandering monster skirmishes use compact 6x6 or 7x7 fields, mid-chapter elites expand to 8x8 or 9x9 with added elevation tiles, and the climactic story bosses like the Act III duel against Верховный summon contested scripted arenas up to 10x10. Each tile falls into one of three categories that govern how your party navigates the battlefield, making map-reading just as critical as turn order in this grid based battle system.
| Tile Type | Effect on Movement | Effect on Attack |
|---|---|---|
| Plain | Standard MP cost (1 tile = 1 MP) | No modifier |
| Difficult | Costs 2 MP per tile entered | No modifier |
| Blocking | Cannot be entered by ground units | Blocks line of sight for ranged attacks |
Flying or mounted units ignore Difficult terrain entirely, while heavy melee classes pay double. Blocking tiles are usually pillars, walls, or destructible objects, and breaking them mid-fight is a real strategy when enemy archers are pinning your party behind cover.
Movement Points by Class
Every class has a different MP pool, and the difference is the single biggest reason your frontline can close distance while your backline mages stay safely out of reach. The table below lists the typical MP values reported by players who tested the remake's pre-release beta, so treat them as a starting point rather than a final patch snapshot.
| Class | Base MP per Turn | Range Type | Typical Role |
|---|---|---|---|
| Swordfighter | 4 | Melee | Frontline DPS |
| Lancer | 3 | Melee (1–2 tile reach) | Anti-cavalry tank |
| Archer | 3 | Ranged (2–5 tile reach) | Backline DPS |
| Mage | 2 | Magic (1–6 tile reach) | Backline burst |
| Cleric | 2 | Magic support | Healing and buffs |
| Rider | 6 | Melee (1–2 tile reach) | Mobile flanker |
A common mistake new players make is treating MP as stamina. It is not — MP resets fully at the start of your unit's turn, and unused movement is wasted. If your Swordfighter has 4 MP and the enemy is 3 tiles away, you can attack and then either move 1 more tile or save the MP for a defensive reposition next turn. Always spend the full budget.
Line of Sight and Targeting
Ranged and magic abilities require a clear line of sight. Blocking tiles, certain enemy units, and elevation differences can all break a line, which forces you to either walk around cover or find a way to destroy it. The grid battles reward players who think in diagonals and corners, not straight lines.
This is also where the Astonishia Story turn order guide becomes relevant, because a unit that cannot see a target cannot attack it, and you can use that fact to "hide" fragile backline units behind a tank until their turn comes around again.
Turn Order, Action Economy, and Ability Basics
Once you understand the grid, the second pillar of the Astonishia Story turn based combat is the turn order system. Unlike real-time-with-pause games, every fight here is a strict sequence: side panel shows the queue, units act one at a time, and the round only ends when both sides have passed.
Reading the Turn Order Bar
The turn order bar runs along the side of the screen and lists every unit in the order they will act. Units with higher Speed stat go first, ties are broken by Agility, and the bar resets at the start of every full round. This means if your Cleric acts 4th in round 1, the Cleric will again act 4th in round 2 unless an ability or status effect modifies their Speed.
Since Astonishia Story does not display numeric Speed values in combat, the only way to gauge the turn-order spread is through community-tracked data: most physical attackers like Leon cluster around Speed 18-22, mages like Senin tend to sit lower at 12-15, healers such as Aurum fall in the 8-12 range, and tanks like Rabites hover near 6-9, so enemy Archers at roughly 20-24 will almost always outspeed your backline while slow boss monsters rarely act before turn 3.
| Stat Priority | Effect on Turn Order |
|---|---|
| Speed | Primary tiebreaker, higher = acts first |
| Agility | Secondary tiebreaker for equal Speed |
| Status effects | Slow, Haste, and Stop can shift or skip turns |
| First-strike | Certain abilities can interrupt the normal order |
A useful habit is to scan the turn order bar at the start of every round and ask: "Will any enemy act before my healer this turn?" If the answer is yes, you can pre-emptively position the Cleric behind a tank or use a Guard command on a frontline unit to absorb the incoming hit.
Action Economy: Move, Attack, and the Free Actions
Each unit gets one Move and one Action per turn. Movement consumes MP, the Action can be a basic attack or a learned ability, and a small number of effects are flagged as Free Actions that do not spend your main Action slot. Examples include swapping equipment mid-fight (only in the remake, not the original) and using consumable items in some encounter types.
| Action Type | MP Cost | Action Slot | Notes |
|---|---|---|---|
| Move | 1 MP per plain tile | Uses Move | Cannot exceed base MP |
| Basic Attack | 0 MP | Uses Action | Range is class-specific |
| Ability | 0 MP (some cost HP) | Uses Action | Limited uses per battle |
| Item Use | 0 MP | Uses Action | Consumable, single target |
| Guard | 0 MP | Uses Action | Halves damage taken until next turn |
| Wait | 0 MP | Uses Move OR Action | Skips turn, preserves position in queue |
Notice that Wait is one of the most powerful tools in the system. Waiting passes your turn voluntarily, but it does not change the order of the remaining bar. This means if you wait with your Swordfighter, the enemy Cleric will still act before your Cleric on the following turn, but you can hold your Swordfighter's position to react to enemy movement. Experienced players use Wait constantly to bait enemy melee units into overextending.
Ability Basics: Melee, Ranged, and Magic
Every ability in Astonishia Story has three numbers that matter more than anything else: Minimum Range, Maximum Range, and Area of Effect. Reading these correctly is the single fastest way to stop wasting turns on missed attacks — for example, a Fireball cast at Minimum Range 1 will still hit a 3x3 area centered on your caster, so a Knight standing next to a Wizard can wipe out a clustered mob in one turn instead of whiffing into empty grid space. Misplaying these three values is also the most common reason new players report "the attack missed" against targets that looked adjacent, because diagonal adjacency counts in Astonishia Story's grid but two straight tiles apart does not, even when line of sight appears clear on the battlefield preview.
| Ability Type | Example | Min Range | Max Range | AoE | Typical Use |
|---|---|---|---|---|---|
| Melee Strike | Power Slash | 1 | 1 | Single tile | Frontline burst |
| Reach Attack | Lance Thrust | 1 | 2 | Single tile | Anti-line |
| Ranged Shot | Aimed Arrow | 2 | 5 | Single tile | Backline damage |
| Battle Magic | Fireball | 1 | 6 | 3x3 tiles | Group clear |
| Heal | Cure | 1 | 4 | Single tile | Sustain |
| Buff | Strengthen | 1 | 3 | Single tile | Pre-fight setup |
If an ability has a Minimum Range of 1 and a Maximum Range of 1, the target must be directly adjacent — diagonally counts as adjacent, but two tiles away in any direction is out of reach. If the ability's range is 1–6, you can target anywhere from adjacent tiles up to 6 squares away as long as line of sight is clear. The full list of abilities, sorted by class, is covered in the Astonishia Story battle tactics deep dive, but the table above covers roughly 80% of the abilities you will use in the first 10 hours of the game.
Positioning, Flanking, and Grid Control
Knowing how to move and when to act is only half of the battle. The other half is where you choose to stand, because the Astonishia Story tactical combat system bakes several modifiers directly into tile relationships. Two characters standing on the right tiles can deal nearly double the damage of the same attack from a neutral position.
Facing and Flanking
Every unit has a facing direction shown by a small arrow on their sprite. Attacking an enemy from the side or from behind grants a Flank Bonus, which according to community testing increases hit chance by 15% and damage by roughly 20%. Attacking an enemy from the front has no bonus, and attacking a unit that is currently guarding is reduced.
| Attack Angle | Hit Chance Bonus | Damage Bonus |
|---|---|---|
| Front | None | None |
| Side | +10% | +10% |
| Behind | +15% | +20% |
| Guarded target | -25% | -50% |
Because facing is tied to the last action a unit took, you can manipulate it. If an enemy Archer fired north last turn, its facing arrow points north and you can flank it from the south for the full Behind bonus. This is one of the most consistent ways to delete priority targets before they get a second turn.
Height Advantage and Line of Sight
Some boards in the remake include multi-level terrain — bridges, cliffs, or stair tiles — and the higher tile grants a small damage bonus to ranged and magic attacks fired downward. The bonus is modest (around +10% damage, according to early player reports), but it is enough to matter in boss fights where every point of damage counts. Lancer and Rider classes can also use elevation to break line of sight by ducking behind a ledge on their turn.
Crowd Control: How to Lock Down a Tile
Crowd control in Astonishia Story is limited compared to modern tactics games, but the tools that exist are sharp. Pinned units cannot move on their next turn, Slowed units lose half their MP, and Stopped units lose their turn entirely if the effect lands. None of these are guaranteed — each has a base hit chance that scales with the caster's Magic Attack versus the target's Magic Defense.
| Status | Effect | Common Source | Counter |
|---|---|---|---|
| Pin | Cannot move | Lance, Web spell | Dispel, Wait |
| Slow | MP halved | Magic, certain bows | Buff removal item |
| Stop | Lose turn | High-tier magic | Purge ability |
| Blind | -50% hit chance | Smoke bomb, debuff spell | Time, Heal |
If you want to take down a hard encounter, focus your Slow and Stop attempts on the enemy's highest-Speed unit. Removing one fast turn from the queue can swing a losing fight, and it is a habit that separates casual players from those who clear the optional mercenary bounties without grinding.
A Practical Astonishia Story Strategy Guide for Your First 20 Fights
Theory is useful, but the fastest way to internalize the grid system is to run through a short checklist on every fight. The five-step loop below is what most experienced players do without thinking by the second hour of the game, and it is the core of any working Astonishia Story strategy guide.
Step 1: Read the Turn Order at Round Start
The instant the fight begins, look at the side panel. Identify the three fastest units on each side and ask: "If I do nothing, who acts first and what will they do?" This takes about 5 seconds and gives you the entire turn's plan in a single glance.
Step 2: Identify Priority Targets
Not every enemy is worth the same effort. According to the encounter design visible in the remake's early dungeons, most fights include 2 frontline units, 1 ranged unit, and 1 support unit. The support unit — usually a Cleric or a buffer — is the highest-priority kill. Killing the healer before it can cast Cure usually ends the fight in 3 rounds.
Step 3: Spend MP Aggressively
Do not hoard movement. The most common mistake new players make is leaving 1–2 MP unused because they "might need it later." Movement resets every turn, so any tile you do not cross this turn is a tile your enemy gets for free. Spend the full pool on every unit unless a specific reason forces you to hold.
Step 4: Use Wait to Manipulate the Queue
If your Cleric is about to act and the enemy Archer is in position to one-shot your Swordfighter, click Wait on the Cleric. The Swordfighter will take the hit, the Cleric will still heal next, and you avoid a wasted turn. Wait is a defensive tool as much as an offensive one, and the remake's interface makes it a single click.
Step 5: End the Round With Cleanup, Not Half-Moves
If the fight is clearly won, do not start a new chain of attacks. End the round with your units in defensible positions — a tank between the Cleric and any leftover enemy, ranged units on high ground if available, and any unit below 30% HP pulled back to a tile that is hard to reach. For specific boss patterns, the Astonishia Story boss strategy guide covers the late-game patterns in more detail, but the cleanup rule applies to every fight in the game.
Common Early-Game Mistakes to Avoid
Before you internalize the loop above, here are the five errors the community flags most often in the first 10 hours of play — each one stems from misreading Astonishia Story's grid based battles, where a 1-tile positional error or a wasted Cleric turn translates directly into lost HP, lost MP, and a longer fight on the turn based timeline. Reading this list once is not enough; revisit it every time the difficulty curve spikes in Acts 2 and 3, because the same five mistakes cause the majority of wipes reported in the combat guide community threads.
-
Tunneling on damage dealers and forgetting the Cleric — a dead healer means a slow, grinding loss
-
Standing on Difficult terrain with a melee class — you pay double MP and reach the fight one turn late
-
Ignoring facing and attacking from the front — you lose 20% of your damage for free
-
Forgetting to use items — potions, ethers, and status cures are unlimited in towns and can swing a fight
-
Skipping Wait — players who never use Wait end every turn either overextended or under-defended
Advanced Tips: When the Grid Stops Being New
Once the basics feel automatic, the Astonishia Story combat guide graduates from "don't stand in Difficult terrain" to the kind of decisions that decide optional boss outcomes. These are not required for the main story, but they are what the system rewards when you push into the post-game mercenary hunts.
Baiting Enemy AI Into Bad Positions
The enemy AI in the remake is improved from the 1994 original, but it still follows a priority system: it targets the lowest-defense unit in range, then the closest unit, then any unit it can damage. You can exploit this by leaving a weak but fast unit (a Cleric, for example) just out of range of a strong enemy. The enemy will burn MP trying to reach the Cleric, end its turn one tile short, and present a flank for your Swordfighter next turn. This is the simplest version of "AI baiting" and it works in roughly 70% of optional fights.
Ability Synergies and Combo Windows
Some abilities in the game combo into each other. A unit that uses Power Slash to break an enemy's guard leaves that enemy vulnerable to a follow-up Lance Thrust from an allied Lancer, which in turn triggers a Chain Break that grants a small damage bonus to the entire party for the rest of the round. These combos are not documented in-game, but according to community data they are the main way late-game damage scales.
Saving and Reloading for Critical Fights
The remake adds a save-anywhere feature that the original 1994 release did not have, and it is the single most powerful tool in your arsenal for hard content. If you are about to enter a boss you have never beaten, save immediately before the cutscene. This lets you try different opening positions, different opening abilities, and different turn order decisions without redoing the entire dungeon. The Astonishia Story gold guide covers save-file management for both the campaign and the post-game economy if you want to go deeper.
Reading the Battle Forecast
Before you confirm any attack, the game shows a Battle Forecast window with predicted damage, hit chance, and counter-attack risk. Most new players ignore it. The most efficient players read it every time. A 95% hit chance is not 100%, and a counter-attack on a low-HP Swordfighter can end your run before the boss even reaches half HP. If the forecast shows a counter that would kill your unit, switch to a different attacker or reposition — the 5 extra seconds of reading saves the entire fight.
Frequently Asked Questions
How does the turn order actually work in Astonishia Story combat?
Turn order is determined primarily by each unit's Speed stat, with Agility as the tiebreaker. A side panel shows the full queue at the start of every round, and units act in that fixed order. The bar resets at the start of each new round, so a fast unit that acted first in round 1 will usually act first again in round 2 unless a Slow or Haste effect changes things.
What is the best class for a brand new player in the Astonishia Story battle system?
Swordfighter is the most forgiving starting class because it has 4 MP, decent range, and the highest physical durability among melee units. Pair a Swordfighter with a Cleric, and you can clear the first three dungeons without learning any advanced mechanics. Once you understand the grid, the Archer and Lancer classes open up more aggressive options.
Can I move and attack on the same turn in the Astonishia Story grid battles?
Yes, every unit has one Move action and one Action per turn. Movement is paid in MP (1 MP per plain tile, 2 MP per Difficult tile), and the Action can be a basic attack or a learned ability. Unused MP does not carry over, so always spend the full pool unless you are intentionally using Wait to manipulate the turn order.
Do flanking bonuses really matter in Astonishia Story tactical combat?
Yes, flanking matters more than almost any other modifier in the game. Attacking an enemy from the side grants roughly +10% hit chance and +10% damage, and attacking from behind grants +15% hit chance and +20% damage. Because facing follows the last action a unit took, you can manipulate enemy facing to set up these bonuses on demand.
Where can I find a full list of abilities in the Astonishia Story combat guide?
In-game, abilities are listed in the pause menu under each character's profile. For a community-maintained breakdown of every ability by class, including range, cost, and best targets, see the Astonishia Story battle tactics guide, which indexes the full skill list and explains the strongest ability combos.